Graphical Automation
Graphical Automation
Automation is the recording and playback of parameter changes over time. A parameter in this case is a Track Effects parameter, such as a Distortion's Drive or Tone. Every effect device in Renoise can be automated, which can be achieved by two separate methods: graphically or with Effect Commands. Automation of Plugin instruments and their parameters is also possible by using an *Instr. Automation Device.
The easiest way to create Automation is to record it. This can be done by clicking, holding and moving a Track Effect's slider with the right mouse button while playing back the song. Depending on the Automation setting in the Pattern Editor's Control Panel ![]() , your changes will then be recorded as either Effect Commands or as graphical envelopes.
, your changes will then be recorded as either Effect Commands or as graphical envelopes.
To quickly create an empty Automation and switch over to the Automation Editor, you can also click on the small rectangle to the right of each parameter. When a parameter is automated, an icon is shown in this rectangle. In the image below, the icons next to the parameters represent automation by (top to bottom): Effect Commands, envelopes, both.
Automation
To open the Automation Editor, select its icon at the lower left corner of the Renoise interface: ![]()
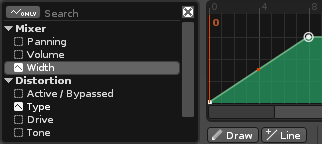
The Automation Editor consists of two main parts. To the left you will see a list of all available parameters and devices for the currently active track. To the right of this is the envelope editor, where you will draw and edit the Automation. Beneath the envelope editor are a series of options and buttons used to edit and modify the envelope. You can expand the editor's vertical size by click-dragging the bar just above it.
The envelope grid is labelled along the x-axis at the top with numbers that represent time as the line-numbers of the Pattern Editor. The value range of the selected parameter is represented along the y-axis.
The Automation Editor will follow the progress of a song's playback as it playing. To turn off this behaviour, allowing you to edit the automation of any pattern while a song is playing, disable Pattern Follow mode in the Transport Panel.
Zoom Levels
You can zoom in and out of the Automation envelope by placing the mouse pointer over the grid and scrolling the mouse wheel. The default zoom level is a single pattern, with the x-axis showing the full range of the pattern's line-numbers. Zooming in you can begin to see fractions of lines all the way down to 1/256th, allowing for incredible resolution should you need it. Zooming out you can see individual patterns and eventually the entire song. Pattern numbers are shown in an envelope's top left corner. The pattern you are currently editing is highlighted, which you can change by clicking on another.
When Lock is enabled, the zoom level is shown beneath the grid in the Automation Toolbar and can be changed there too.
Creating Automation
To create an Automation point, select a parameter from the Automation List and then double-left-click somewhere inside the grid. Alternatively, double-click on the parameter, which will create an envelope and insert a point at line 0 with the parameter's current value.
To create pre-defined patterns, right-click on the Automation grid area and expand the "Process" option. There you can select the options "Create Random Points", "Create Linear Curve", "Create Exponential Curve" and "Create Sine Curve".
When an Automation already exists for the current pattern, that parameter's name will be highlighted in the Automation List.
Editing Automation Envelopes
Once you've created an Automation, it can be edited with the mouse or keyboard in various ways:
Editing with the Mouse
Double-clicking in the envelope where no point is set will create a new point. Double-clicking on an existing point will remove it. If you click and hold on an existing point then you can drag it around and set a new value. You can also use the Draw tool located at the bottom left of the toolbar to manually draw in a waveform. If the Snap mode is disabled, or is enabled and set to "Grid", then the waveform will be drawn at the resolution of the current zoom level.
- "Left Shift" + moving a point horizontally will remove all points that the mouse pointer touches.
- "Left Control" + moving a point vertically will fine-tune its value. "Left Control" + hovering over a point will display the point's value.
Left-click and dragging across the grid will create a highlighted area. Any points within this area will be selected and can be adjusted all at once. You can also use the right-click menu on the grid to use the selected area in following ways:
Right-click Context Menu
- Cut: Cut only the points contained within the selection area.
- Copy: Copy the selection area.
- Paste: Paste the previously copied points into the envelope from the cursor position (left-clicking in the envelope will set the cursor position for pasting operations).
- Paste Continuously: Paste the previously copied points into the envelope from the cursor position and repeat until the end of the envelope.
- Insert Paste: Paste the previously copied points into the envelope from the cursor position and move the rest of the envelope to right. Note that any points shifted outside of the current pattern will be lost.
- Cut Selected Time: Cut the selected area of time from the envelope.
- Delete Envelope: Delete the whole envelope.
- Process: Applies to the entire envelope or the selected area if there is one.
- Create Random Points: Creates points of random value.
- Create Exponential Curve: Creates an exponential curve rising from 0 to 1. Use the flip buttons to achieve other curves.
- Create Linear Curve: Creates a linear curve rising from 0 to 1.
- Create Sine Curve: Creates a single cycle sine curve.
Editing with the Keyboard
If you middle-click on the envelope, or right-click and select "(Set Keyboard Focus Here)", you can control the envelope with keyboard shortcuts:
- To move the selection cursor in the envelope, use the left/right arrow keys or the "Home" and "End" keys.
- To create a new point or remove an existing one, hit the "Enter" key.
- To enter an exact value for a point in the numerical edit field, press "Left Shift + Enter" and type in the value.
- To select parts of the envelope, hold down the "Left Shift" key while moving the cursor.
- To cut the selection press "Left Control + X".
- To copy the selection press "Left Control + C".
- To paste the cut/copied selection, move the cursor to the desired position and press "Left Control + V", or "Left Control + P" to paste continuously, or "Left Control + I" to insert.
- "Left Control + K" will cut the selected area of time from the envelope.
Tip For Smooth Pattern Transitions
To maintain a smooth envelope between two patterns, simply create a point in the second pattern's envelope and move it to the beginning of the pattern. Now, as you move the point up/down, it will automatically snap to the waveform of the previous pattern.
Automation Controls And Options
- Draw: Draw mode allows you to draw points on the envelope with the mouse.
- Line: The Line tool allows you to create a linear ramp. This will be maintained across multiple patterns.
- Snap: Will snap the horizontal creation and movement of points to:
- The current resolution of the grid.
- Every pattern-line.
- Every beat.
- Value: The value of the selected point. Left-click to enter a new value.
- Snap to Value: Lock and choose the zoom factor of the envelope view.
- Envelope Type: Dictates how the envelope's value will change over time.
- Points: Only changes value when a point is encountered.
- Lines: Initially interpolates in a straight line, but the handles between points can be used to create curves and control their easing.
- Curves: Interpolates with a smooth cubic curve, easing into and out of points.
 - Cut the whole envelope.
 - Copy the whole envelope.
 - Paste the whole envelope.
 - User-configurable envelope presets. Right-clicking a button will store the current envelope as a preset, left clicking will recall a previously stored envelope.
 - Move the envelope or selected points to the left/right. Will wrap around the edges.
 - Flip the envelope or selected points horizontally/vertically.
 - Humanizes the envelope or selected area by randomly adding or subtracting a small amount to the point values.
Automation List
The list indicates which parameters are automated with a small icon next to their name. Left-clicking on a parameter will select it, while double-clicking on a parameter which has no Automation will create a new blank envelope.
Right-clicking on a name allows you to delete the Automation for the current pattern or the whole song. This also applies when right-clicking on a device name, which will delete the Automation for all of the effect's parameters.
The search field at the top of the list allows you to quickly find a parameter or effect. Enabling the "Automated Only" button will only show effects in the list which are already automated.
Master Track Extras
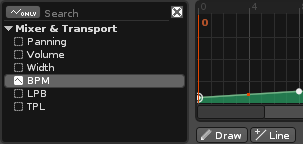
In addition to the usual effect parameters, the Master Track allows you to control three additional native Renoise parameters via Automation: the song's Beats Per Minute, Lines Per Beat and Ticks Per Line settings. Unlike other parameters though, these three will only update once per line and points cannot be placed between the lines.


